A reliable tent is essential for an enjoyable outdoor camping experience. Wondering how to set one up? Pitching a tent might seem daunting at first, but with the right knowledge and a few simple steps, it’s surprisingly quick – many modern tents can be assembled in as little as 5 minutes! After installation, it’s crucial to confirm everything is secure. To help you master this fundamental outdoor skill, we’ve compiled a comprehensive guide packed with practical tips and advice for effortlessly setting up your tent.
Key Steps for Pitching Your Tent:
- Inspect your tent and all components
- Select an ideal camping spot
- Lay out the ground cover/footprint
- Assemble the tent poles
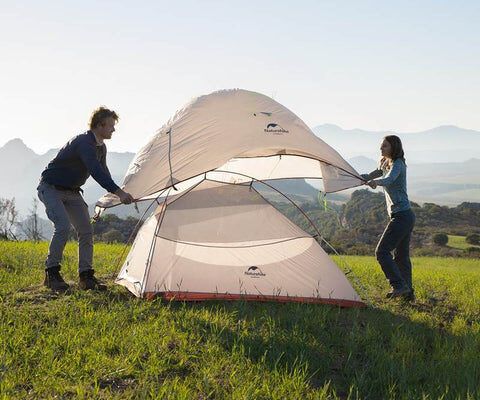
- Erect and secure the tent structure
1. Pre-Trip Preparation
For newcomers to camping, it’s highly recommended to familiarize yourself with your tent’s components and setup process at home before your trip. Practicing the assembly indoors first will build your confidence and ensure a smoother experience at the campsite.
Essential Tent Accessories (Naturehike Cloud Up 2 Example):
For a typical tent like the Naturehike Cloud Up 2, you’ll generally find these components:
- 1 x Ground Mat/Footprint
- 11 x Tent Pegs/Stakes
- 5 x Guy Ropes
- Tent Poles (usually shock-corded)
- 1 x Rainfly/Outer Tent
- 1 x Inner Tent Body
- 1 x Compression Bag/Stuff Sack
Additionally, consider purchasing a separate ground footprint for enhanced protection of your tent’s floor from abrasion and moisture.
Pre-Camping Checklist: Inspect Your Gear:
Before heading out, a thorough check of your tent and accessories is vital:
- Is the tent fabric intact, free from rips, tears, or damage?
- Are the tent poles, pegs, and other metal components free of rust and in good working order? Do the poles connect smoothly?
- Are the guy ropes and tie-downs frayed, broken, or missing?
- Confirm all accessories are present and accounted for against your tent’s packing list.
- If anything is missing or damaged, ensure you repair or replace it promptly.
Remember to check all components, including the rainfly, inner tent, and ground footprint.
2. Arriving at Your Campsite
Once you’ve reached your chosen destination, the next critical step is to carefully select and prepare your tent site.
Selecting Your Tent Site Wisely:
Consider these important factors when choosing where to pitch your tent:
- Opt for the mostlevel ground possible to ensure a comfortable night’s sleep.
- Clear the area of any debris such as rocks, sharp sticks, or pinecones that could damage your tent floor or cause discomfort.
- Avoid pitching too close tosteep slopes/mountainsides (potential for rockfall), densebushes (insects, hidden hazards), or directly besiderivers/waterways (flash floods, morning dew, cold air).
Step-by-Step Tent Assembly (Naturehike Cloud Up 2 Example):
For a visual guide, search for a video like “How to Set Up a Tent – Naturehike Cloud Up 2”. Here are the typical steps:
- Begin by removing all components from the tent’s storage bag: the inner tent, rainfly, poles, ground footprint, guy ropes, and pegs.
- Lay the ground footprint flat and spread it evenly on your chosen spot.
- Place the inner tent body directly on top of the ground footprint.
- Assemble the tent poles, ensuring all sections are securely connected. Insert the ends of the assembled poles into the designated grommets or corner pockets of the inner tent.
- Attach the inner tent to the pole structure using the clips or buckles provided, working your way around the tent.
- Drape the rainfly over the inner tent, aligning its doors and vents with those of the inner tent.
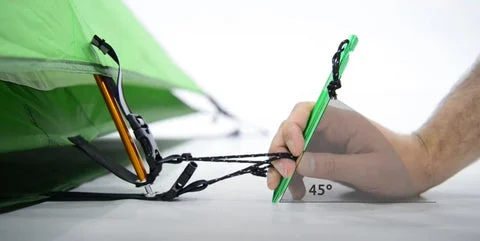
- Secure the rainfly to the inner tent or poles using the attached buckles or velcro tabs. Peg down the four corners of the tent into the ground. When inserting pegs, aim for a 45° to 60° angle to maximize holding power, leaving about 3 cm (1-2 inches) exposed for easy removal.
- Attach and tension the guy ropes from the rainfly to additional pegs in the ground. Properly tightening the guy ropes creates necessary airflow between the rainfly and inner tent, reducing condensation and increasing stability.
- Finally, perform a thorough check to confirm your tent is fully pitched, taut, and securely anchored.
3. Essential Tent Maintenance and Care
Practical Tips for Tent Longevity:
- Always remove shoes before entering your tent to prevent tracking in dirt and damage.
- Avoid wearing heavy or muddy hiking boots inside the tent.
- Keep all open flames and heat sources well away from tent fabric.
- Protect your tent from sharp objects that could puncture or tear the material.
- Store your tent in a dry, cool, and well-ventilated location.
- Minimize prolonged exposure to direct sunlight, which can degrade fabric.
- Implement measures to prevent mold and mildew growth.
While most tents offer waterproofing, continuous wear and tear, coupled with improper drying, can compromise this protection. Storing a wet tent for an extended period significantly increases the risk of mold and mildew forming, often within 24 hours.
Therefore, after every use, if your tent’s surface is damp, never pack it away wet. Always allow your tent to air dry completely in a well-ventilated area before storing it. This applies equally to the inner tent and rainfly; both must be thoroughly dry to prevent fabric degradation, mold, and materials sticking together, which ultimately shortens your tent’s lifespan.
Cleaning Your Tent: For general dirt, rinse your tent with clean water only. Do not use harsh detergents or a washing machine, as this can strip the tent’s waterproof coating. For more stubborn grime, a gentle wipe with warm, soapy water and a soft sponge is appropriate. Ensure it’s completely dry before packing away.
Proper care and diligent maintenance will significantly extend the life of your tent, allowing you to enjoy countless camping adventures for years to come.
Summary
A tent is an indispensable piece of gear for outdoor pursuits like camping, backpacking, and expeditions. For many new campers, the process of pitching a tent can seem challenging. This guide has provided detailed suggestions and practical advice to help both novice and experienced adventurers confidently set up their tent and ensure its proper maintenance, maximizing its lifespan for future escapades.