Packing a trekking backpack might seem like a straightforward task: just toss your items in and head for the hills, right? Not exactly. Overlooking the thoughtful organization of your gear and the precise distribution of weight can lead to significant discomfort and make your trek considerably more challenging. To help you avoid these pitfalls and ensure you have all your essential items readily available throughout your adventure, here are some expert recommendations on how to efficiently pack your trekking backpack.
The Core Principle of Backpack Packing
The fundamental rule for packing your trekking backpack is to compartmentalize its interior into distinct zones, each designated for specific categories of outdoor clothing and hiking equipment. Before you even begin, lay out everything you intend to carry on your excursion. Then, prioritize your gear to distinguish four primary zones within your pack:
- First Group (Bottom Zone): Items you will rarely need until camp or the end of the day, such as your sleeping bag, camp clothes, or a spare pair of very heavy trekking shoes.
- Second Group (Core/Middle Zone): Heavier items that you’ll use occasionally but need stability for. This includes reserve trekking shoes (if not in the first group), cooking canisters, trekking cookware, substantial food supplies, and larger cosmetic bags.
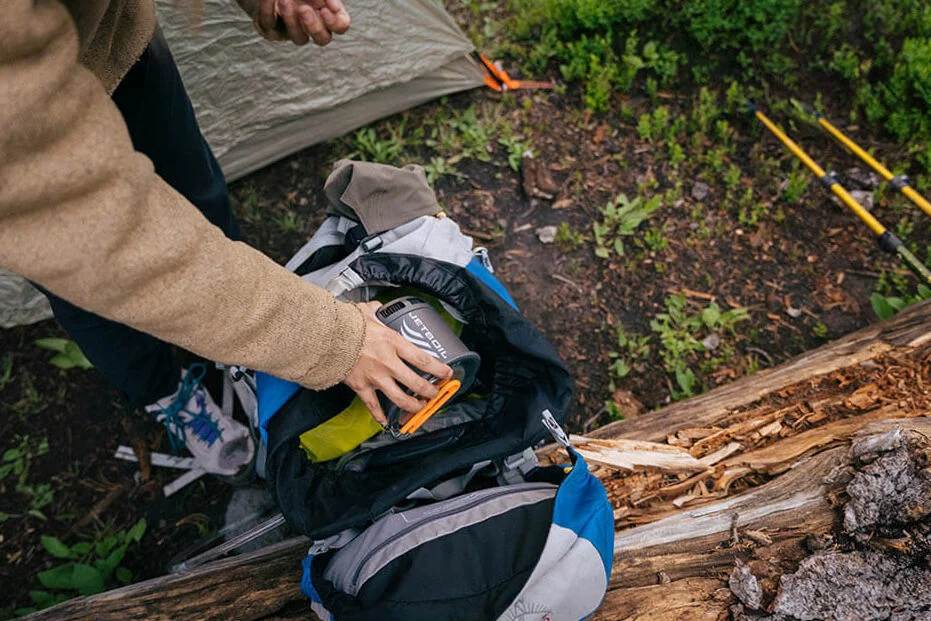
- Third Group (Top/Quick Access Zone): Articles that require frequent access or are essential for immediate needs. This typically includes a Softshell, rain jacket, puffy jacket, or hardshell (season-dependent), a first-aid kit, headlamp, thermos, snacks, and important small objects like a multi-tool, power bank, or documents.
- Fourth Group (External Attachments): Larger or awkward items that are best secured to the outside of your tourist backpack. This might include water bottles, a sleeping mat, or components of a tent.
Once you’ve made this careful selection and categorization, arranging your gear optimally inside a trekking backpack becomes far simpler.
I’ve deliberately listed these groups in ascending order, from bottom to top, reflecting their placement in the backpack. The idea is to place items you’re least likely to use en route at the very bottom. Is this problematic for access? Not necessarily, as many modern mountain backpacks feature an additional lower zipper, allowing direct access to the bottom compartment. This design means you can retrieve your sleeping bag, for instance, without having to unpack everything above it.
Examples of hiking backpacks featuring a convenient lower compartment include the Jack Wolfskin Highland Trail and the Deuter Futura Pro.
The strategic placement of the first two groups is paramount, as it dictates the backpack’s center of gravity. Meticulous attention is required here, as improper packing can lead to significant issues. For example, if heavy items are placed too high, the entire pack can become unstable. You’ll keenly feel this once you start hiking, as the backpack will sway awkwardly. In extreme cases, it could even cause you to lose balance on challenging terrain.
Therefore, always strive for an even weight distribution. The guiding principle is simple: the heavier an object, the closer it should be to your body. By positioning the densest part of your backpack snug against your back, your mountain expedition will be considerably more comfortable. If you place a particularly heavy item on one side, ensure there’s a counterbalance on the opposite side. Additionally, remember to cushion fragile items and those with sharp edges with softer materials (like a towel or spare shirt) to prevent damage to your gear and the backpack itself.
Smaller, heavier items (such as a multi-tool) are best distributed into the smaller pockets. Contemporary hiking backpacks are frequently equipped with an array of such practical storage compartments.
The upper section of your backpack and easily accessible external pockets should house items you’ll need quickly and frequently during your journey. Always ensure you have your tourist jacket, snacks (energy bars, gels, or sandwiches), a thermos or water bottle, and crucial safety items like a headlamp and first-aid kit within easy reach.
Correct organization within your backpack guarantees that you can swiftly respond to sudden weather changes, an unexpected drop in energy, or minor mishaps. During critical moments, fumbling through all your gear is a significant waste of precious time.
Not all items are suited for internal backpack compartments. Less maneuverable or bulky gear is often better secured to the exterior using elastic cords, clips, straps, Velcro, and carabiners. Common external attachments include camping equipment such as sleeping mats and tents. Sometimes, a hiking mug or extra water bottle, as well as trekking poles (when not in use), are also hung externally. This method is also excellent for drying wet clothes or towels while on the move.
What else can pose a challenge on the trail regarding your backpack? Certainly, an incorrect luggage capacity for your trip length. If you’re embarking on a short day hike in the mountains, avoid packing a backpack with maximum capacity. Why? Because too much empty space allows the contents to shift and settle, causing the trekking backpack to become misshapen in places. This is uncomfortable during hikes and can even be hazardous, as it compromises your balance, especially during tricky maneuvers on narrow, uneven paths.
Conversely, what if you’re preparing for an extended mountain trek and possess a large backpack, but find it challenging to fill? Can a multitude of straps and cords compensate for insufficient capacity? Absolutely not! It’s vital to select the right backpack size. Your expedition gear doesn’t need to resemble a Christmas tree; every item attached externally reduces stability. This increases the risk of snagging on branches or rocks, which in challenging mountain conditions, could lead to a serious incident.
Wondering what capacity is ideal for your needs? If you’re planning a single day in the mountains, a model with a 20-35-liter capacity is an excellent choice. For a multi-day excursion with overnight stays in shelters, a 40-55-liter backpack should suffice. If you dream of a true expedition, carrying all your camping equipment, you’ll likely require a larger expedition backpack, typically ranging from 50 to 80 liters.
For many years, trekking backpacks were primarily offered in unisex versions. These “universal” models were, in reality, designed mainly with the standard adult male physique in mind, often neglecting the average woman’s height and chest rib cage specifics. This design flaw frequently led to discomfort for women, struggling to achieve a proper fit around the hips and chest. Fortunately, outdoor brands have increasingly recognized this issue, and modern tourist backpacks are now commonly available in distinct versions tailored for men and women.
Are you currently choosing a mountain backpack? On Sport.ro, you’ll discover reliable trekking backpacks for women, men, and children from esteemed outdoor equipment brands such as Deuter, Gregory, Helly Hansen, Osprey, Jack Wolfskin, and Thule. These brands incorporate innovative technologies and utilize robust, high-quality materials to ensure superior comfort, safety, and functionality on all your adventures.